April 13, 2012

Kids Bathroom Part 3 - Reveal

Pin It Now!

Hey there!  Today I am so excited to show you how my kid's bathroom turned out.  I absolutely love it.  I decided to frame in the mirror and incorporate it into the board and batten design.  I think it turned out great.  I also made the mirror the same as the doors in our house.  They all have a small piece of wood between the top board and the vertical sides too.  I think it ties it into the rest of the house and makes it look like it was always there. 


This side of the room was a major oops that ended up turning out for the best.  The chalkboard started out as a framed picture from Ikea.  It had a natural wood frame that wasn't going to work in here anymore.  I wanted to paint it white to match the woodwork in here.  The glass was glued to the picture frame, and while I was trying to remove it, it broke.  I felt so bad.  It was one of those moments that brought me back to childhood.  I truly felt that I was going to get in trouble.  Then I remembered that I was a grown up and therefore completely allowed to destroy my own stuff.  Yay!  After I broke it, I had to figure out what to do with it.  In the end I decided on a chalkboard.  It may seem funny to have one in the bathroom, but it has been great.  I am using it to teach the kiddos how to spell. 

The little sign under it came about after my daughter thought it would be funny to have a sign in the bathroom that said "all employees must wash their hands before returning to work".  My husband came up with "ALL CHILDREN MUST WASH THEIR HANDS BEFORE RETURNING TO PLAY".  Originally it was printed on the chalkboard, but I decided to make it permanent on a leftover 1X6.  I don't know if I will keep it on the ledge forever.  Honestly, I just haven't gotten around to putting a fastener on the back yet.
 

Here is the sink area again only from a different angle.  Sorry about the bad picture.  This bathroom has zero natural light (no windows) so it proved a bit tricky to photograph. 


The picture above the towel was taken by a local photographer and friend a year ago. I just love it. I found the frames at ROSS for $5.99 a pop.  You all probably don' t have to shop at Ross do you?  It is one of the best stores around here.  I know how sad that sounds.  Have I mentioned that I live in a small town? The frames have a shiny silver finish and add a bit of glam to the room.  I also love the little sand dollar.  It was a gift from my daughters 2nd grade teacher.  It adds a little beachy charm to the room.


The photos above the toilet are of the kiddos on the Oregon Coast last summer.  They are lovely reminders of a great family vacation.   

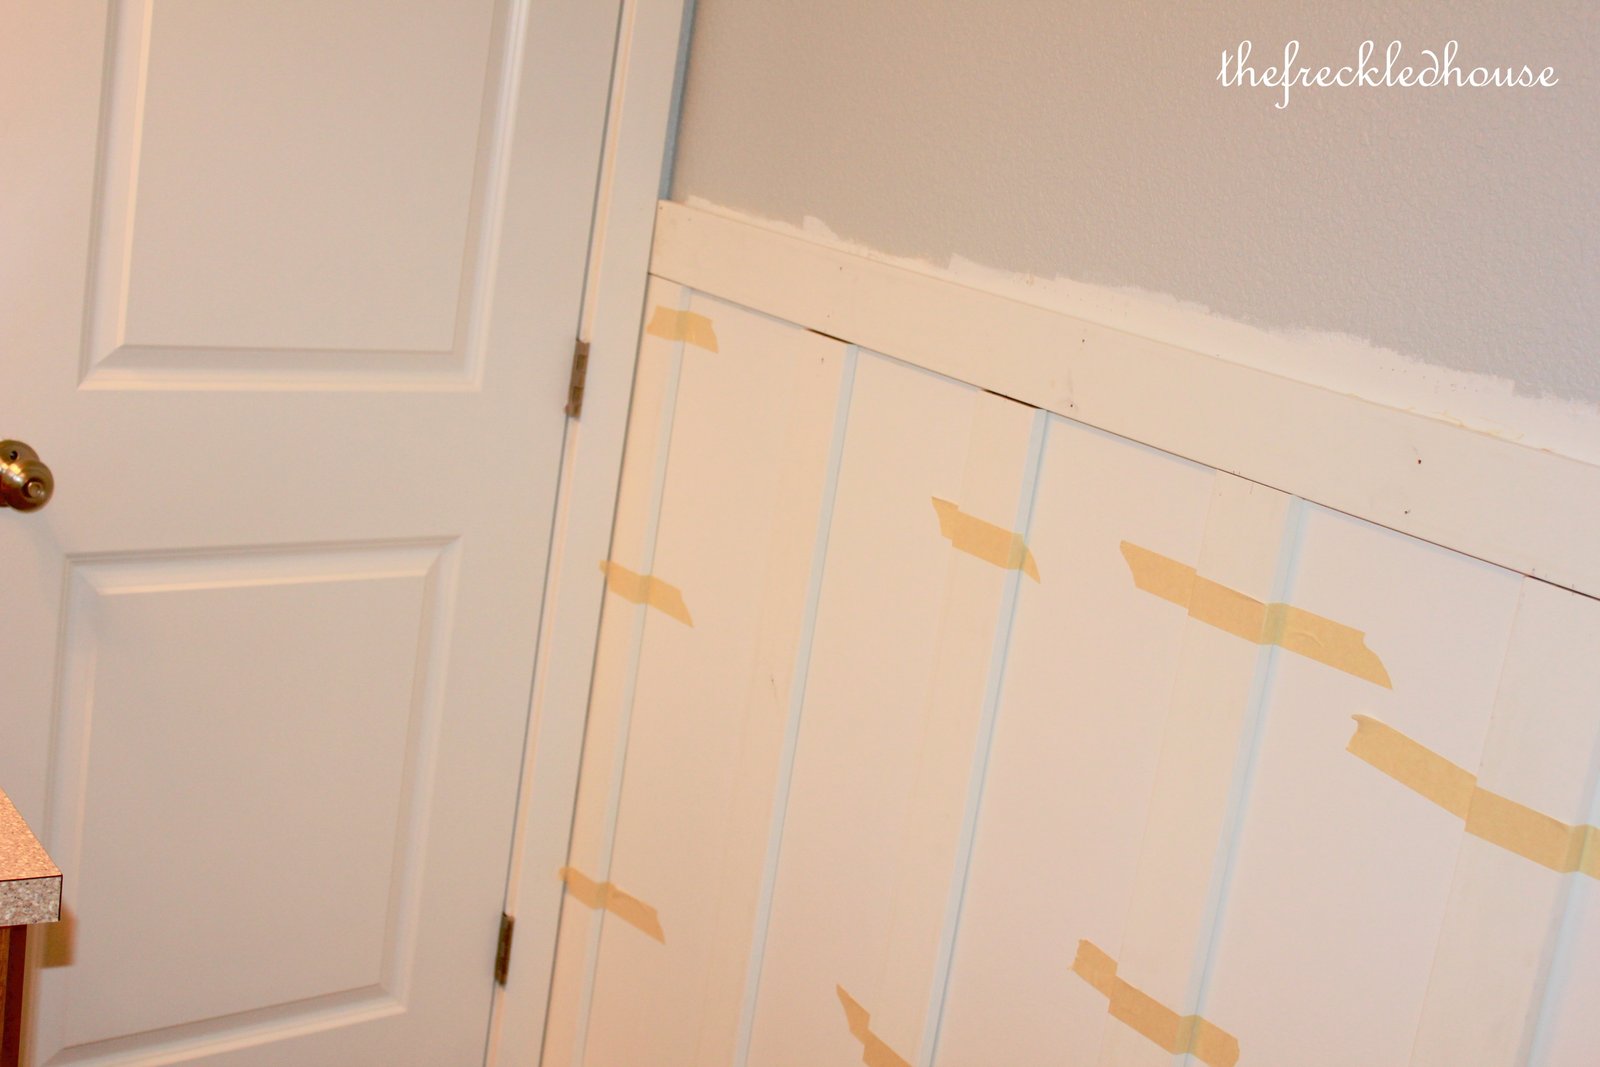
In this picture I am trying to show you the difference in texture between the wall and the area I skim coated.  It is hard to see in the picture, but the skim coated walls are really smooth and the contrast makes it look right.  Does that make sense?


Here is a photo of the shower curtain that I painted.  Yes you heard me right!  I'll show you how to do it in my next post.


I found this cool little tooth brush holder at Bed Bath and Beyond.  This bathroom also serves as the guest bath on the main floor, so it is nice to have everything tucked away.


Isn't it cool!


It perfectly matches the hooks and towel bar I bought for the bathroom.


Actually, this is supposed to be a toilet paper holder, but I don't think any one will ever know.


Can you keep a secret!  This bathroom revamp is full of mistakes.  I hate to admit it.  There are areas that make me want to cry when I look at them.  But, I have had several friends and family members in here and no one but me even notices them.  (I'll admit I haven't been pointing them out).  My point is that things don't have to be perfect to be beautiful.  So, if you are considering making a change in your home, don't be afraid to jump right in.  I hear from so many friends that they could never do something like this.  I think they could if they just tried.  Just Do It!
Posted by Picasa

April 12, 2012

Kids Bathroom Part 2 - Board and Batten

Pin It Now!

Lets catch you up.  In my last post I talked about smoothing out the drywall texture by applying a skim coat.  If you are interested check here.  For my board and batten I used 1X4 vertical pieces and a 1X6 topper.  I also removed the old baseboards and replaced them with a 1X6.  This gives it a nice chuncky look.  I also used a piece of brick moulding on the very top to create a nice little ledge.  I don't seem to have any photos of it so you will have to see it in the reveal pictures.

I tried to follow the studs when attaching the vertical boards, but sometimes I wasn't able to.  In those spots I used my good old friend, construction adhesive. 


This stuff is great.  I can't believe how strong the initial tack is on this stuff.  Warning!  You better move fast with this adhesive, because it sets fast.  After 15 minutes you won't be able to move the board without some demolition style force. 

When I started this project I assumed that the walls in the bathroom were straight.  I mean, it's a new house so the walls will be straight right?  Wrong!  There was a major bow near the bathtub.  In order to get the boards to sit flush with the wall we needed to support them while the adhesive set.  Enter the towel bar.  This was my husband's genius...I give him full credit.  We removed every towel bar in our house (3) and used them to brace the boards to the bowed wall.  They worked great. 


 I will show you the final reveal tomorrow.  I think you will like it...I sure do.

Jo
Posted by Picasa

April 10, 2012

Kids Bathroom Part 1 - Skim Coat

Pin It Now!
A while back I decided that the kid’s bathroom needed a revamp. In its previous life it had builder beige walls and not a lot of character. I have been hard at work and am ready to show you the results. Because I am new to blogging I didn't take any before shots of the bathroom. That said, I do have in-between shots. I started out painting the ceiling and walls of the bathroom. I opted for Sherwin Williams "Extra White" on the ceiling. It is a stock color and it is what all the doors and trim in our house are painted. For the walls I chose Sherwin Williams "Misty". It is a light gray that reads blue in certain light. In this space it is a beautiful gray blue...just what I wanted.


I have been admiring several other bloggers and their lovely board and batten wall treatments. I knew I had to have one too. But, oh no...I have textured walls. What to do?  The options that I found were 1. live with it 2. find a very thin board to cover the texture up and 3. do a skim coat. I definitely didn't want to live with it. Finding a thin board proved to be impossible in my small town. There is no big box home improvement store for miles. So that left doing a skim coat. I didn't even know what a skim coat was before tackling this project. Everything I read said it was time consuming, messy and labor intensive (you have to sand between coats). I also read that it was doable for a do-it-yourselfer like myself. So with a can of dry wall mud, a putty knife and a can-do attitude in my pocket I set to work to make those walls smooth. I won't do a full tutorial on skim coating here, there are better resources available...from experts. The basic process involves smearing a layer of drywall mud over the wall, smoothing it out with a trowel or sometimes a putty knife and letting it dry for 24 hours.


First up I needed to tear out the original tile backsplash to make way for the board and batten and mirror frame.  I ended up needing to lower the mirror to accomodate for the mirror frame.

This is what the wall looked like after the first coat of drywall mud.
The next day I sanded down the whole surface to remove imperfections and make as smooth as possible.
I then started the steps all over again. Repeat. Repeat. Repeat. Do this until your arm feels like it will fall off, I mean until you are happy with the smoothness. Then you can prime, do the board and batten thing, and paint. Did I like skim coating? No. Would I do it over again? In a heartbeat. It makes the board and batten look great. I couldn't be happier with the results.